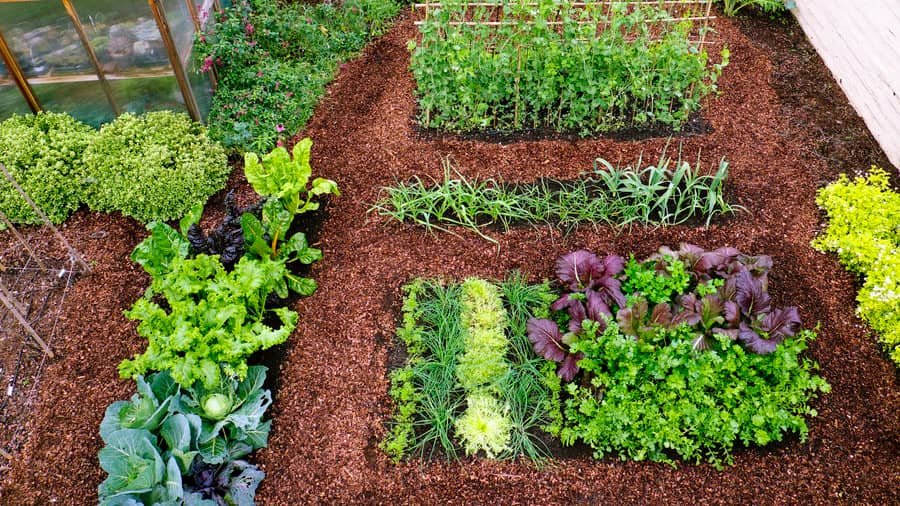
Growing vegetables during the winter months can be a rewarding venture, even in the colder climates. As the season changes, so does the array of vegetables that your garden can accommodate. Opting for cold-hardy crops means you can enjoy fresh produce during a time when most gardens lay dormant. Your selection includes robust greens, flavorful roots, and sturdy brassicas, each with varieties well-suited to braving the frosty conditions.

To ensure success, you need to understand the nuances of winter gardening. This involves selecting the right vegetables that not only survive but thrive in the cooler temperatures. Some vegetables, like kale, become even more flavorful after exposure to frost, developing a sweetness that summer varieties can’t match. Other crops, such as garlic, benefit from being planted in the fall and yield an early spring harvest with a bit of planning and patience.
Carrots
Carrots are a versatile and hardy root vegetable that you can cultivate in your winter garden. They tend to develop a sweeter taste when grown in cooler temperatures as the cold stimulates sugar accumulation in the roots.
When to Plant:
Ideally, you should sow carrot seeds directly into the soil about 2 to 3 weeks before your last expected frost date. This allows them to establish before winter.
Soil Requirements:
- Type: Loose, well-draining soil
- pH: Slightly acidic to neutral (pH 6.0 – 7.0)
Planting Depth and Spacing:
- Depth: ¼ inch deep
- Spacing: 2 to 3 inches apart
- Rows: 12 inches apart
Carat and Nutrition:
Carrots are rich in beta-carotene, which your body converts to vitamin A, and they also provide fiber and antioxidants.
Caring for Your Carrots:
Make sure to keep the soil moist but not waterlogged. Thinning the seedlings is crucial; overly dense planting can result in small or deformed carrots.
Harvesting:
Carrots can be harvested when they reach the desired size, but no later than the ground freezing. If protected with mulch, carrots can often be harvested throughout the winter months.
To learn more about carrot varieties and their resistance to cold, visit Gardening Chores.
Remember, patience is key; carrots can take several weeks to germinate, and depending on the variety, up to 3 months to reach maturity. Enjoy the crisp, sweet bounty of your efforts with each harvest.
Broad Beans
Broad beans, also known as fava beans, are a robust winter vegetable suitable for your garden. These beans not only survive cold temperatures but can be one of the first plants you sow as spring approaches.
When to Plant:
Sow your broad beans in spring as soon as you can work the soil—ideally when soil temperatures are between 60° and 65°F, although they can tolerate as low as 40°F.
Soil Preparation:
For optimal growth, prepare your garden bed in a sunny spot with well-draining soil. If your winters are harsh, protect young plants with a layer of mulch or use cloches.
Sowing:
- Depth: Plant seeds 2-3 inches deep.
- Spacing: Place seeds 6-8 inches apart within the row.
- Rows: Maintain row spacing of 18 to 30 inches.
Care Tips:
- Watering: Keep the soil evenly moist, especially during dry spells.
- Support: As they grow, broad beans may need support to prevent them from falling over.
- Weeding: Keep the area weed-free to reduce competition for nutrients.
Broad beans mature in about 80 to 100 days, ready to harvest before the full heat of summer kicks in. Their hardiness and ease of growth make them an ideal choice for gardeners looking to extend their growing season with nutritious, versatile vegetables.
Lettuce
In the chill of winter, certain varieties of lettuce thrive. You can extend your gardening season by choosing types that are resistant to cold temperatures. Here’s how to grow lettuce during the colder months.
Selecting Varieties: Choose lettuce types that are well-suited for cooler weather. Here are some options:
- Loose-leaf lettuce: Hardy and with a fast growth cycle, it handles cold well.
- Romaine/cos lettuce: Sturdy leaves with good cold resistance.
- Butterhead/Bibb lettuce: Forms a rosette shape and can tolerate mild frost.
- Crisphead/Iceberg lettuce: Require a bit more care as they are less frost-tolerant.
Planting and Care:
- Timing: Plant about 4-6 weeks before the first expected fall frost.
- Soil: Prepare your garden bed with well-draining soil, rich in organic matter.
- Watering: Keep the soil consistently moist, but not waterlogged.
- Protection: Utilize cloches, row covers, or cold frames to shield your lettuce from harsher frosts.
Harvesting:
- Harvest leaves as needed, choosing from the outside to allow the plant to continue growing.
- For head lettuces, wait until they reach the desired size and firmness.
By selecting the right lettuce varieties and providing a little extra care, you can enjoy fresh greens from your garden even in winter. For specifics on winter-hardy lettuce, consider visiting Rural Sprout for a selection of types, and Simplify Gardening for advice on varieties that are ideal for colder climates.
Kale
Kale is a hardy, leafy green that thrives in cooler weather, making it an excellent choice for your winter vegetable garden.
When to Plant: You can sow kale seeds directly in your garden in the late summer for a fall harvest, or plant them near the end of winter for an early spring crop. Kale can tolerate cold temperatures; it can survive freezes and even improve in flavor after exposure to frost.
Soil Requirements: For optimal growth, ensure your soil is loamy and well-drained, enriched with organic matter. Kale prefers a pH between 6.0 and 7.0.
Planting Instructions:
- Plant seeds 1/2 inch deep.
- Space seeds about 1 inch apart in rows or bands.
- For mature plants, space them approximately 12 to 18 inches apart.
Care Tips:
- Water your kale plants regularly to keep the soil moist but not soggy.
- Use mulch to preserve soil moisture and prevent weed growth.
- Fertilize lightly with a balanced fertilizer.
Harvesting:
- Begin to harvest when leaves are about the size of your hand.
- Pick the outer leaves first, working your way in, to allow the plant to continue producing.
Pests and Diseases: Watch out for common pests like aphids and caterpillars. Employing floating row covers can help protect your plants.
By following these guidelines, you’ll be able to grow and enjoy nutrient-packed kale throughout the colder months.
Leeks
Leeks are a robust addition to your winter garden. Like garlic, they benefit from being planted before the winter begins. Ideally, plant your leeks at least 4 to 6 weeks before the ground freezes. This timing allows them to establish roots and endure the cold season.
Climate Tolerance
- Many leek varieties withstand deep frosts down to 12.2°F (-10°C) without protection.
- With proper insulation, such as mulch or cloches, leeks can survive even harsher temperatures.
Growing Tips
- Choose winter-hardy varieties for optimal results.
- Protect your leeks from extreme weather with mulch or row covers.
When it comes to taste, leeks are quite versatile and can be used in a myriad of dishes. Their flavor profile blends well in stews and soups, and they are an excellent source of nutrition during the colder months. You can enjoy the full plant, as the leaves, stems, and bulbs are all edible.
Harvesting Leeks
- Wait until the leek’s stem is at least 1 inch in diameter.
- Carefully dig around the leek to avoid cutting the bulb.
- Store your harvested leeks in a cool, dry place.
For detailed care instructions, including how to keep leeks alive through winter, check this out: How to Keep Leeks Alive Through Winter – Bountiful Gardener. Growing leeks can be a rewarding endeavor, bringing you fresh flavors to your table
Mustard
Growing Conditions:
Mustard greens require full sun to partial shade and well-drained, fertile soil. Start by sowing seeds directly in the ground, about a half-inch deep, as mustard is a cool-season crop that germinates quickly.
Planting Schedule:
- Spring: Plant 2-4 weeks before the last frost.
- Fall: Plant 6-8 weeks before the first frost date.
Watering and Care:
Keep the soil consistently moist but not waterlogged. Thin seedlings to about 3 inches apart once they’ve sprouted. For continuous harvest, plant seeds in succession every few weeks.
Pests and Diseases:
Watch out for aphids and flea beetles. Utilize floating row covers to protect your mustard greens. Rotate crops to prevent soil-borne diseases.
Harvesting:
- Young Leaves: Harvest when they’re tender and mild in flavor.
- Mature Leaves: Cut when larger for a more pungent taste.
Types of Mustard Greens:
- ‘Southern Giant Curled’: Robust flavor, frilled edges.
- ‘Red Giant’: Slightly spicy, colorful leaves.
- ‘Tendergreen’: Mild flavor, heat tolerant.
Mustard greens can be harvested within a few weeks for baby greens, or wait longer for full-sized leaves. These greens are versatile in the kitchen, perfect for salads, stir-fries, and sautéed dishes.
Parsnips
Parsnips are a versatile and hardy winter vegetable that thrive in colder temperatures. As a root vegetable, they have a sweet, earthy flavor that is enhanced by frost and cold weather.
Planting:
You should sow parsnip seeds outdoors in early spring, typically as soon as the soil can be worked. They need a long growing season, so planting by late spring is crucial. Select a sunny spot with deep, loose, and fertile soil. Plant seeds about 1/2 inch deep and 1 inch apart in rows, and expect germination in two to three weeks.
| Soil Temperature | Planting Depth | Row Spacing |
|---|---|---|
| 55-65°F (13-18°C) | 1/2 inch | 12-18 inches |
Care during growth:
- Watering: Maintain even soil moisture, especially during germination and early growth.
- Thinning: Once seedlings are a few inches tall, thin them to stand 3-6 inches apart.
- Weeding: Keep the area around your parsnips weed-free without disturbing their roots.
- Fertilization: Apply an all-purpose fertilizer at planting and ensure the incorporation of plenty of organic matter.
Harvesting:
Parsnips take about four months to mature. They can be harvested after the first frost in fall through the winter. The cold helps convert starches into sugars, improving their flavor. To harvest, loosen the soil around them and gently lift the root from the ground, taking care not to break it.
Your parsnips can be left in the ground and harvested throughout the winter as needed. If you prefer, you can store them in a cool and damp place like a root cellar, extending their use through the winter months.
Spinach
Choosing the Right Variety:
Select a variety of spinach that is known to perform well in cooler temperatures. Look for terms like ‘cold-hardy’ or ‘winter’ in the variety’s name.
Soil Preparation:
- **Texture**: Your soil should be loose and well-draining.
- **Nutrients**: Enrich the soil with compost or well-rotted manure.
- **pH Level**: Aim for a near-neutral pH between 6.5 and 7.0.
Planting:
Plant spinach seeds approximately 1/2 inch deep in the soil. Space rows about 12 to 18 inches apart.
Watering:
Keep the soil consistently moist, especially during germination and growth periods.
Temperature:
Spinach can survive a frost and even light snow. However, protect it from harsh freezes with row covers or a cold frame.
Harvesting:
Harvest when leaves are of a desirable size. Smaller leaves are more tender, while larger leaves are better for cooking.
Pest Control:
Maintain cleanliness and watch for common pests such as aphids. Use organic methods like neem oil or insecticidal soap as needed.
For more detailed growing tips, see how to Plant, Grow, and Care For Spinach in Your Garden and learn about Growing Winter Spinach.
Swiss Chard
Swiss Chard is a hearty green that thrives in cooler weather, making it an ideal choice for your winter vegetable garden. It’s a versatile vegetable that can be harvested in both mild and colder climates, enduring temperatures as low as 15°F (-9°C).
When planting Swiss Chard, aim for a soil temperature of at least 50°F for optimal germination. The seeds are quite large and should be sowed about an inch deep in the soil. You should space them roughly 2-4 inches apart initially and then thin the seedlings to maintain a distance of 6 inches between mature plants, with rows spaced 12 inches apart.
To harvest Swiss Chard, begin when the plants are about 6 to 8 inches tall. Cut the outer leaves approximately 1.5 inches above the ground level, and take care not to damage the central part of the plant. This will encourage continuous growth and further production of leaves.
Here are a few bullet points to keep in mind:
- Swiss Chard is robust and can survive in cold weather.
- Soil temperature: At least 50°F for seed germination.
- Planting depth: 1 inch, with seeds initially spaced 2-4 inches apart.
- Thinning: To 6 inches between plants after seedlings are a few inches tall.
- Harvest: Cut outer leaves as needed, without harming the plant’s center.
By following these guidelines, you can enjoy a steady supply of Swiss Chard throughout the winter months.
Turnips
Turnips are a versatile and hardy winter vegetable that thrives in cool temperatures. When preparing your garden for turnips, aim for well-draining soil with plenty of organic matter. Here’s a simple guide to get you started:
Site and Soil Preparation:
- Amend the soil with aged manure or compost to enrich it.
- Ensure the pH is between 6.0 and 7.5.
Planting:
- Sow seeds ¼ to ½ inch deep, spacing them 1 inch apart.
- If planting in rows, maintain 12 to 18 inches between them.
Watering:
- Provide at least one inch of water per week to avoid a bitter or woody taste.
Thinning Seedlings:
- After germination, thin seedlings to stand three to six inches apart.
Harvesting:
- Harvest turnips when they are two to three inches wide for the best taste and texture.
Remember to protect young crops with row covers and to keep the soil consistently moist, especially during dry spells. With proper care, your turnips can be a delicious addition to your winter harvest.
Beets
Beets are a resilient root vegetable ideal for your winter garden. They prefer cooler temperatures, typically between 50°F to 65°F (10-18°C), making them perfect for growing in colder months. To ensure successful germination, plant beets approximately one month before the last spring frost when soil temperatures are at least 50°F.
Soil Requirements:
- pH: Aim for a soil pH between 6.0 and 7.0. Beets are adaptable to slightly alkaline soils but avoid planting in acidic conditions (pH below 6.0).
- Texture: Loamy, well-drained soil is best. Remove rocks and debris to allow unobstructed root development.
Planting Tips:
- Seed Soaking: Soak beet seeds in water for 12 to 24 hours before planting to accelerate sprouting.
- Sowing Depth: Plant seeds at a depth of 1/2 inch.
- Spacing: Space seeds 1 to 2 inches apart. Thin the seedlings to 3 inches apart once they sprout to give the roots ample room to grow.
Care Instructions:
- Regularly water your beets, ensuring the soil remains moist but not waterlogged.
- Thin the sprouts to avoid overcrowding, which can lead to smaller beets.
Beets have a reasonable growth period, requiring about 45 to 65 days to reach harvest. Enjoy multiple harvests by practicing succession planting every 3 weeks up to when the temperature reaches 80°F (26°C).
For detailed guidance on beet varieties, consider exploring this comprehensive guide on how to grow beets, which highlights the importance of proper thinning and soil preparation.
Broccoli
Broccoli is a cool-season crop that thrives when average daily temperatures remain between 65° and 70°F. Ideally, you should plant broccoli so it comes to harvest before temperatures consistently hit higher marks.
Here are steps to get your broccoli growing successfully:
- Choose the Right Variety: Opt for varieties known to do well in winter temperatures and have shorter growing seasons.
- Soil Preparation: Your broccoli will grow best in full sun in soil that is slightly acidic, with a pH between 6.0 and 6.8. Prepare your soil bed with 2 to 4 inches of well-aged compost and a thin layer of aged manure before planting.
- Planting: Sow seeds 2-3 weeks before the last frost date, or plant transplants a bit later. Space your plants approximately 12 to 20 inches apart, allowing for enough room for growth.
- Watering and Fertilizing: Keep the soil consistently moist. Fertilize with a low-nitrogen formula (A 5-10-10 fertilizer is recommended) three weeks after transplanting seedlings into your garden.
- Harvesting: Harvest your broccoli when the heads are fully formed but before the yellow flowers start to bloom. Cut the center head off with a sharp knife, which encourages the side shoots to produce smaller heads for later harvesting.
Remember, broccoli can tolerate a light frost, but if a heavier frost is expected, consider using row covers to protect your plants. Happy gardening!
Brussels Sprouts
Brussels sprouts are a sturdy, frost-resistant vegetable, thriving in cooler weather and sometimes even improving in flavor after exposure to frost. Ideally, you should plant them in early fall to enjoy a winter harvest.
Planting Instructions:
- Choose a site with full sun and shelter from strong winds.
- Make sure your soil is well-draining with a pH of 5.5 to 6.8.
Growing Tips:
- Brussels sprouts require 80-130 days from planting to harvest.
- They perform best in temperatures between 45-75°F but can tolerate down to 20°F for short periods.
- Incorporate rich organic matter and calcium into the soil to promote growth.
Harvesting:
- Size matters: Harvest sprouts when they’re about 1 inch in diameter.
- From bottom up: Pick the sprouts from the bottom of the stalk first, as they’ll mature sooner than those at the top.
For additional guidance on varieties and specific care needs, consider exploring resources that discuss the range of Brussels sprout varieties or provide tips for growing Brussels sprouts in winter.
Remember, Brussels sprouts are nutrient-rich and an excellent addition to your winter garden. With proper care, you can enjoy these tasty vegetables throughout the colder months.
Cabbage
Growing cabbage during the colder seasons can provide you with a fresh harvest throughout the winter months. To ensure successful growth, consider the timing and conditions for planting.
When to Plant: Aim to sow your winter cabbage seeds midsummer to allow them enough time to mature. Planting can continue until late summer or early fall, especially in milder climates, where seeds can germinate at temperatures as low as 40°F (4°C).
Planting Depth and Spacing: Sow seeds ½ inch deep in the soil. If transplanting seedlings, space them 12-18 inches apart. Proper spacing is crucial for adequate air circulation and sunlight.
Water Requirements: Your winter cabbage will need less water compared to spring varieties. However, ensure the soil remains moist and avoid waterlogging.
Optimal care and conditions for growing cabbage:
| Care Aspect | Details |
|---|---|
| Soil Preparation | Rich, well-draining soil with a pH around 6.5. |
| Sunlight | Full sun to partial shade. |
| Fertilization | Balanced fertilizer during growth stages. |
Remember to protect your cabbages from pests by using appropriate netting or barriers. With the right maintenance and monitoring, you’ll be able to enjoy your own homegrown cabbages even in the cooler seasons.
Cauliflower
Cauliflower is a versatile winter vegetable that thrives in cooler temperatures. If you’re looking to add it to your winter garden, here are some key tips to ensure success.
Soil and Planting:
Plant cauliflower seeds in rich, well-drained soil. You’ll want to aim for full sun exposure to promote healthy growth.
- Spacing: Maintain at least 18 inches between plants.
- Depth: Sow seeds 1/2 inch deep.
Watering and Feeding:
Consistent moisture is crucial for cauliflower. Water the plants regularly to keep the soil evenly moist but not waterlogged.
- Fertilization: Feed every 3-4 weeks using a nitrogen-rich fertilizer.
Temperature:
Cauliflower plants do best when the air temperature is between 60°F and 70°F. In some regions growing cauliflower in winter is ideal, especially where winters are milder.
Blanching:
When heads begin to form, blanch them to protect from sun and maintain flavor.
- Blanching Technique: Fold the outer leaves over the head and secure them with a plant tie.
Harvest:
Harvest cauliflowers when the heads are compact, white, and firm.
- Signs for Harvest: If the heads appear ready but aren’t quite full size, they may still be harvested to avoid over-maturity.
Including cauliflower in your winter garden can be a rewarding experience, and with these tips, you’re equipped to grow this delicious and nutritious vegetable.